Some last thoughts about my first-ever backpacking trip/ visit to a National Park…
Planning/ reservations
Jared handled all of our reservations to obtain our permit, which is required during peak season – May 22 to Sept 26. Not only should you make a reservation in advance, but you also need to pick up your physical permit at your starting trailhead before you embark on your hike. There is a limit of 25 people/ day to hike either clockwise or counterclockwise, and 3/4 of those reservations are able to be made in advance. The rest are available as day-of walk-ups. My friends Justin and Stephanie were able to get a walk-up permit on 4th of July weekend last year. We were lucky to make and get our reservations for a clockwise loop well in advance – early May for our late June trip. Make sure to pick the correct entry trail for the direction you wish to go in. Going clockwise, your entry trail is Wood’s Creek; counter-clockwise, the entry is Bubb’s Creek.
Here is the helpful trip planner from SEKI, but you may want to peruse their Rae Lakes Loop info page first.
Maps/ distances
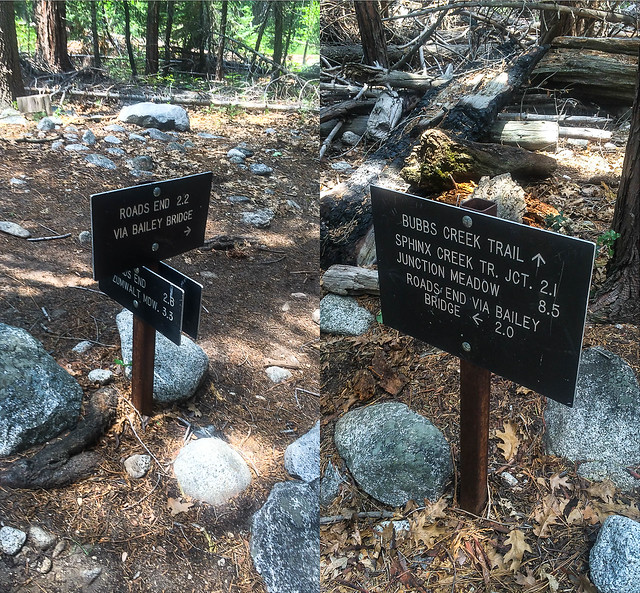
The various maps, and posted signage/ other information about distances in the park, and on the SEKI website, are all different. Trying to plot a map on existing services like MapMyHike, or Sierra Mapper, for instance, yields distances of around 38-39 miles. The official SEKI page mention provides a chart that declares the loop is 41 miles. Other blogs report mileage around 46 miles. Even the signeage at an official junction is different! For paper maps, I liked the one published by the Sequoia Natural History Association, which helpfully indicates established campsites, pit toilets and bear boxes. These are readily available at the various Visitors Centers in the park.
Gear reviews
My North Face GTX 109s worked very well. These are billed as hybrid hiking shoes/ trail runners, but I don’t know that I’d ever use them for running since I prefer my lighter Brooks Cascadias. Breaking in the GTXs by walking around our neighborhood and Golden Gate Park during puppy jaunts worked pretty well. I was definitely unsure of them in the beginning since the stiff shoe tongue dug into the tops of my feet a bit, but that discomfort eventually went away. I found that I didn’t need the extra ankle support and the soles were stiff enough to support me with 30 lbs on my back.
Black Diamond Alpine Carbon Cork trekking poles – Very light and very easy to maneuver. I was thoroughly grateful for them throughout the hike – they provided lots of support as I got tired and they were super-helpful during stream crossings, or any steeper sections, especially on the downhills. There were a tremendous amount of steps on the trail, and some of these were steeper than others.
Osprey Ariel 65 – I had purchased this pack for Thailand, and it’s bigger than Danny’s pack, but I’ve grown fond of it, and generally like its various pockets and straps. When stuffed full, though, the brain tends to fall and hit or lean against my head, which is more than a little annoying. And, considering that there are packs out there that weigh about half of what my pack alone weighs, I may want to consider switching at some point.
Moving Comfort FineForm vs Patagonia Barely Sports Bra – Both were comfortable, both were lightweight, both dried quickly. The Moving Comfort has the benefit of looking the most like a sports bra or swimsuit top, and I felt comfortable just wearing that as my top as I washed my hair in the creek on our first day. But because the Patagonia is still a bit lighter and dries a bit faster and is just a tad more comfortable, I’m getting another one in black, and will be carrying two Patagonias on the trail.
Crocs for camp shoes – these worked well enough, but I’ve subsequently replaced them for an even lighter pair of camp slippers purchased for under $2 at the Daiso in Japantown.
Sony Alpha a6000 camera – I’m quite happy with this camera, and even with the kit lens. It takes amazing, hi-resolution photos, and I know I’ve barely scratched the surface of functionality for it. I also need to work on my Panoramas.
B-Grip UNO camera holster attachment – fiddly, but kept me from bearing the weight of the albeit fairly light camera around my neck and worked well enough.
Other random thoughts
- Permethrin ALL the things. I had worn Columbia Insect Blocker Shirts and brought one pair of REI-brand women’s hiking pants (Northway style?) that had been sprayed with Permethrin. I didn’t get bitten until I had changed into my nighttime camp clothes – a SmartWool long sleeved shirt – when I received a bite through the sleeve on my elbow; and through some SmartWool socks.
- I need to work on my nutrition on the trail, and force myself to eat even when I’m not hungry.
- I need to figure out my photo-taking strategy. With my hands handling my trekking poles, it’s not always easy to just drop them or loop them to a wrist to grab my camera, which was attached to my backpack with a B-Grip.
- I brought a lightweight wide-brimmed hat so I could hang my mosquito net across my face with a bit of weight. Didn’t use it once.
- It was a warm-ish trip, and I could have done without my fleece and just stuck with my Mountain Hardware Ghost Whisperer micropuff.
- In retrospect, my trouble eating, my slight headache after a night at Rae Lakes — all pointed to signs of mild elevation sickness. I’ll try taking Diamox to acclimate when we start the JMT.
Rae Lakes Loop Posts