DD and I visited New York in December of 2009. He was there for work, I was there to tag along, partially working remotely as well. We also turned the trip into a bar-hopping and salacious dining extravaganza. During our 5 days there, we managed to sample 3 of David Chang’s eateries: Momofuku Ssam Bar, Noodle Bar, and Milk Bar, though I have to admit that the visit to Milk Bar was just a cursory walk-through – we had been lunching at the Ssam Bar next door, and could not pass up a visit to peek at sweets. I don’t much recall what we had at Milk Bar if anything as I was too full from our decadent lunch.
We of course had ramen at the Noodle Bar, arriving just a little after 1pm, and were lucky to be immediately seated at the counter. We loved our seats, being able to peek into the kitchen where we saw dozens of bowls of noodles being prepared, and still more of those luscious pork belly buns assembled.
I was super-excited to get my hands on the cookbook. David Chang and his pal John Meehan co-wrote it — it’s the same partnership behind Lucky Peach — the new foodie quarterly from McSweeney’s. They have a great casual and irreverent style that reads as if they were right there in your kitchen, drinking beer and sh**-talking and walking you through the recipes.
Making Momofuku’s ramen was definitely a weekend project if there ever was one. Even though Steph at Momofuku for 2 indicates that the ramen can be done in a day, I had other obligations and priorities to be able to dedicate just one full day to it. I also chose a weekend when DD would be gone (mushroom foraging), so I could set the schedule and timing of making everything a bit selfishly.
Stock
The stock is the most involved, requiring you to boil, poach, simmer and braise several ingredients from 5-7 hours. Steph from momofuku for 2 broke up her broth-making and proceeded in stages, but I found it easier just to make it all in one fell swoop. It turned out to be a good strategy, as we didn’t have much room in the fridge for a large stock pot.
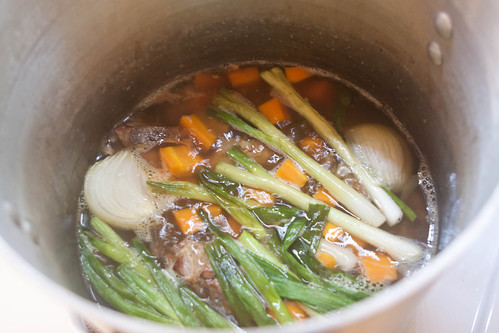
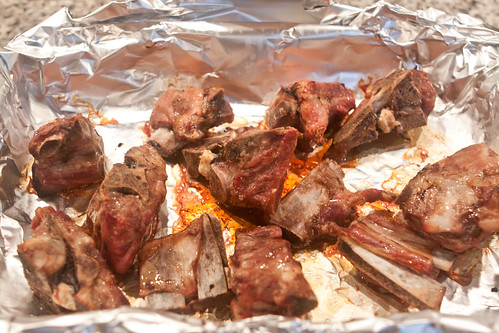
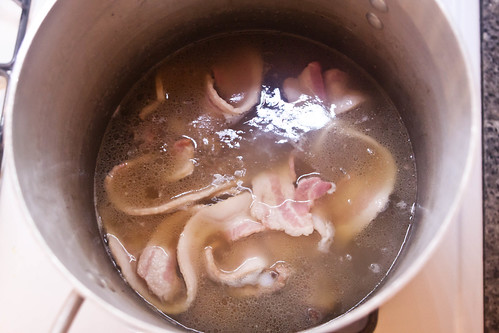
The stock includes (roughly in the order that you’ll get these into the pot): konbu (dried seaweed easily available these days from Whole Foods, or your favourite Japanese market), dried shiitake mushrooms, smokey bacon (preferably Allan Benton’s), chicken parts (I used 4 legs-and-thighs) and pork bones. Some fresh vegetables are added at the end (almost like an afterthought): carrots and green onion and half a regular onion. Note that the type of bones Chang recommends – pork neck bones – may not be so easy to come by. (I did find mine easily at my new favouirite Asian Market – Sunset Super – on 19th and 25th.) If you cannot find these, Chang recommends other kinds of bones – leg bones, for instance – rib bones will not cut it; in his opinion it makes the stock pallid. But neck bones, I’ve just realized, will not give your broth the milky-white consistency and colour that tonkotsu will. Reading Marc’s post for Tonkotsu ramen at NoRecipes explains this.
Before you put in the pork bones (for the remaining 5-7 hours of the simmering process), they must be roasted for an hour (ideally you’ll do this while the chicken bones are boiling away).
Another challenge I had was maintaining the levels of stock. The cookbook doesn’t mention whether I should cover the pot, but did say to replenish the liquid, until after hour five. In retrospect, I should have measured the initial levels of the liquid with even a candy thermometer – in the end, I guesstimated, and ended up with far less liquid than what I was expecting. (The original recipe will make 10-12 cups or so; I had planned on a half recipe.)
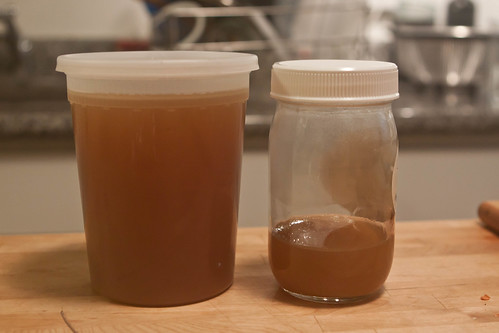
I had basically started at 6pm on the broth proper, finishing sometime after midnight. From 6 quarts of water, and several pounds of vegetable product and meat matter, all I had left was this: a little over a quartful of stock, but it was surely some of the richest, porky tasting stock I had ever had – seeing that I didn’t even add any seasonings: salt, pepper, soy… the liquid was fantastic-tasting as-is. Also, Chang’s directions indicated that one had the option of boiling the stock down, and adding water later as you prep for serving. I decided that this was exactly what happened – that I had reduced the stock a bit too much, and I’d just add water and seasonings later.
Ramen Accountrements
Pork Belly
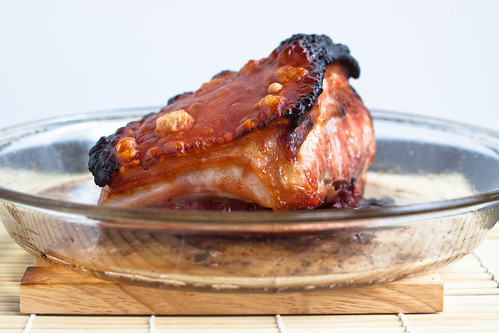
Pork Belly is a must – the recipe also called for pulled pork shoulder, but I decided to just stick to the belly. Cooking this dish is super-simple – around 3 lbs of pork belly, rubbed with a mixture of kosher salt and sugar, excess discarded. Chang indicates that we should use skin-free belly; I left mine on. Apart from some blackened char, the skin turned out well, crisp and crackly and oh, so tasty. Put the belly into a snugly-fitting container and refrigerate overnight. Before cooking, make sure to tip out the excess liquid that has pooled in your container. Cook uncovered at 1 hour at 450 degrees F, turn down the oven to 250 and cook for another hour, until the pork is soft and jiggly. (In retrospect, I could have left the pork in the oven for at least half-an-hour more, on 250, for even more jigglyness.)
Onsen Tamago
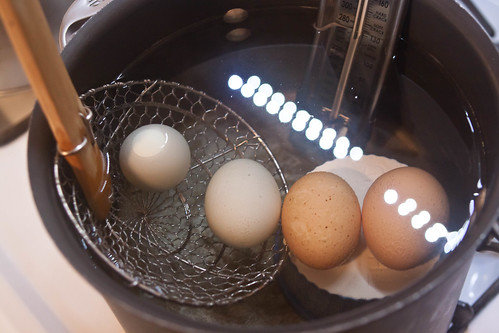
Onsen tamago refers to beautiful eggs boiled in the old-fashioned Japanese way: some folks still take baskets of eggs with them to the natural onsen hotsprings, and will leave them in the water as they themselves soak their cares away for an hour. The result, an egg that still pours out of the shell, with an almost translucent white that has barely solidified and that contains a silky yellow yolk that spills beguilingly out once broken. Here, Chang guides us to cook the eggs at a constant 140-145 degrees for about 40 minutes. The jerry-rigged setup above is my attempt to avoid having the eggs touch the bottom of the pan. My candy thermometer (which I have never used for candy-making) came in handy as well.
Menma/ Pickled Shiitakes
Other items that required some prep, but were not hard:
- Stewed bamboo shoots, or menma (you start with slices from a can, then stew for 30 minutes in some drips and drabs of: sesame oil, usukuchi soy sauce, mirin and a pickled thai pepper. I did not have a pickled thai pepper, and just dropped 1 dried chile into the mixture – it gave the menma a subtle but distinct and pleasant heat.
- Pickled shiitakes: the spent shiitakes from the broth can be turned into soy pickles. Basically you’ll want to cut the stems off the mushrooms, and then simmer/ stew in water, usukuchi soy, and sugar. I personally should remember to reduce the amount of sugar called for. I think these came out too sweet, but DD likes them as-is.
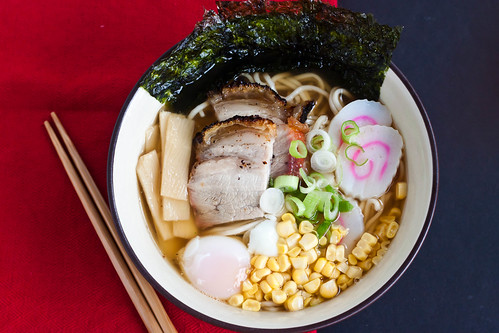
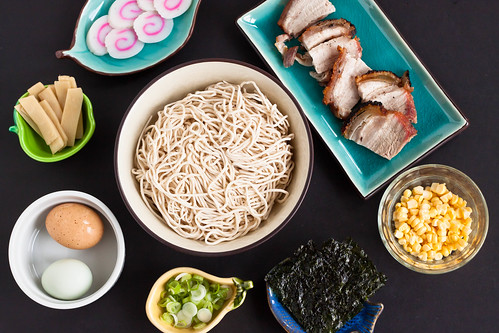
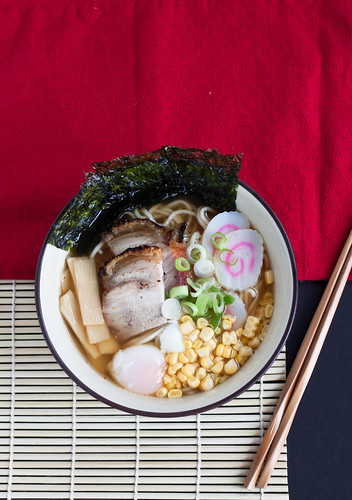
When you’re ready, make sure you’ve got all your mise en place in order. Some items I didn’t mention above: chopped negi (green onion), nori paper (seaweed), seasonal vegetable (Chang recommends raw, sweet corn in the summer), and in the upper left, 11 o’clock in the photo, naruto, or prepared steamed fish cake (easily available in asian markets).
Procedure/ Assembly:
1) Season your broth and keep it hot. If you didn’t make the Tare (a rich, smoky seasoning made by roasting chicken bones, and then charring the fond that develops even further, adding soy, sake and sugar afterwards), you can use usukuchi soy, mirin and salt. If you’ve found yourself with a very reduced and concentrated broth, as I did (after sitting in the refrigerator it will be gelatinous overnight), add about 3/4 cup water to 1 cup of the concentrated stock. Season to taste with about 4 tsp of usukuchi, 4 tsp of mirin, and sprinkles of salt – add in small quantities and taste as you go. Put the broth into your ramen serving bowl.
2) Heat up a pot of boiling water for your noodles. I used store-bought ramen noodles (Chang says using store-bought is more than ok) and cooked them for a about 2.5-3 minutes in boiling water.
3) Once the noodles are done, place them into y0ur seasoned ramen broth.
4) Commence topping immediately: a couple of slices of pork belly, 1-3 slices of naruto, some negi, corn and menma. Slip the nori perpendicular to the bowl so it feathers up in the back. Break the shell and pour your onsen tamago into the broth.
5) Enjoy all your hard labours, slurping the hot broth is more than ok. (At least, we were told this in Japan.)
Lessons/ for future reference:
1) If making pork belly, do the marinade the night before you plan on serving your ramen.
2) Measure your liquid when first starting out. Replenish to original levels as you go, except after hour #5.
3) In the absence of Allan Benton bacon use Fatted Calf bacon.
4) Make the Tare: I felt that the soy, mirin and salt added to the broth didn’t quite elevate it. I’ll make sure to try making the Tare next time, and hope that it adds the depth and complexity I had imagined.
5) Serve the broth as piping hot as you can make it. Make sure that the other toppings are at room temperature or warm – try not to add them to your broth chilled.

Pingback: Momofuku's Cured Hamachi | Tabemasu()
Pingback: Momofuku's Spicy Sausage and Rice Cakes | Tabemasu()
Pingback: Ramen Souper Bowl « btypes()
Pingback: Momofuku To Go | The Harmonious Kitchen()